Fun & Educational Activities
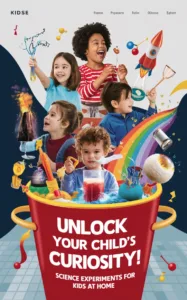
Engaging kids in science experiments at home is a fantastic way to nurture their curiosity and foster a love for learning. These hands-on activities are not only educational but also a lot of fun. Below are some simple and exciting science experiments that you can do with your kids using everyday household items.
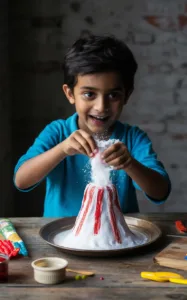
1. Baking Soda & Vinegar Volcano
Materials Needed:
- Baking soda
- Vinegar
- Food coloring (optional)
- Dish soap (optional)
- A small container (like a plastic bottle or a cup)
- Tray or large plate to catch spills
Instructions:
- Set Up: Place the container on a tray or in the sink to catch any overflow.
- Add Baking Soda: Fill the container halfway with baking soda.
- Color It Up: Add a few drops of food coloring to make the ‘lava’ more exciting.
- Add Dish Soap: A small squirt of dish soap can create a foamy eruption (optional).
- Erupt the Volcano: Pour vinegar into the container and watch the chemical reaction create a fizzy eruption.
Safety Tips:
- Supervise: Always supervise children during the experiment to ensure they handle materials safely.
- Avoid Eyes: Be careful not to get vinegar or the reaction mixture in your eyes. If contact occurs, rinse thoroughly with water.
Scientific Explanation:
When baking soda (a base) reacts with vinegar (an acid), it produces carbon dioxide gas, which causes the fizzing eruption.
Additional Fun:
- Creative Volcano: For extra fun, you can build a paper-mâché volcano around the container to make it look more like a real volcano before performing the experiment.
This experiment is designed to be engaging and safe for children, making it a perfect introduction to the fun world of science!
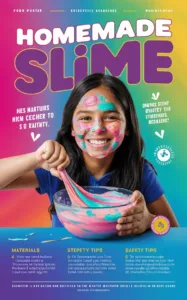
2. Homemade Slime
Materials Needed:
- Glue (white school glue)
- Baking soda
- Contact lens solution (make sure it contains boric acid or sodium borate)
- Food coloring (optional)
- Glitter (optional)
- Mixing bowl
- Spoon
Instructions:
- Mix Glue and Color: In a mixing bowl, pour 1/2 cup of white school glue.
- Add Color and Glitter: If desired, add a few drops of food coloring and a pinch of glitter to the glue and stir well.
- Add Baking Soda: Stir in 1/2 teaspoon of baking soda.
- Activate Slime: Gradually add 1 tablespoon of contact lens solution, stirring continuously until the slime starts to form and pulls away from the sides of the bowl.
- Knead the Slime: Use your hands to knead the slime until it reaches the desired consistency. If it’s too sticky, add a few more drops of contact lens solution.
Safety Tips:
- Non-toxic Materials: Ensure all materials used are non-toxic and safe for children.
- Avoid Eyes and Mouth: Prevent children from getting the slime in their eyes or mouth. If contact occurs, rinse thoroughly with water.
- Wash Hands: Make sure kids wash their hands before and after playing with the slime.
- Supervise: Always supervise children during the experiment to ensure they handle materials safely and don’t ingest any of the ingredients.
Scientific Explanation:
The glue contains polyvinyl acetate, which reacts with the borate ions in the contact lens solution to form long, stretchy polymer chains, creating slime.
Additional Fun:
- Slime Variations: Try adding different textures to the slime, such as small foam beads, to make crunchy slime or glow-in-the-dark paint for an extra cool effect.
This slime experiment is simple, safe, and endlessly fun for kids, making it an excellent hands-on activity to explore chemistry concepts.
3. Magic Milk Experiment

Materials Needed:
- Milk (whole or 2% works best)
- Food coloring
- Dish soap
- Cotton swabs
- A shallow dish or plate
Instructions:
- Pour Milk: Pour enough milk into the shallow dish to cover the bottom.
- Add Colors: Drop different colors of food coloring in various spots on the surface of the milk.
- Dip in Soap: Dip a cotton swab into the dish soap.
- Magic Touch: Touch the soapy end of the cotton swab to the center of one of the food coloring drops and watch the colors burst and swirl.
Safety Tips:
- Non-toxic Materials: Ensure that the food coloring and dish soap are non-toxic and safe for children.
- Supervise: Always supervise children during the experiment to ensure they handle the materials safely.
- Avoid Eyes and Mouth: Prevent children from getting the dish soap in their eyes or mouth. If contact occurs, rinse thoroughly with water.
- Wash Hands: Have kids wash their hands before and after the experiment.
Scientific Explanation:
The dish soap breaks the surface tension of the milk and reacts with the fat molecules, causing the colors to move and swirl in fascinating patterns.
Additional Fun:
- Experiment with Different Milks: Try using different types of milk (skim, almond, etc.) to see how the results vary.
- Color Mixing: Use different combinations of food coloring to explore color mixing and create unique patterns.
This Magic Milk experiment is easy, safe, and provides a visually stunning demonstration of how soap interacts with fat molecules in milk, making it a perfect activity for young scientists.
4. Invisible Ink with Lemon Juice
Materials Needed:
- Lemon
- Water
- Cotton swabs or a paintbrush
- White paper
- A heat source (light bulb, iron, or candle)
- Bowl or cup
Instructions:
- Prepare Ink: Squeeze lemon juice into a bowl or cup. Add a few drops of water to dilute it slightly.
- Write Message: Use a cotton swab or paintbrush dipped in the lemon juice mixture to write a message or draw a picture on the white paper.
- Dry the Paper: Allow the paper to dry completely. The writing will be invisible once it dries.
- Reveal the Message: To reveal the hidden message, gently heat the paper by holding it near a light bulb, running an iron over it on a low setting, or carefully holding it over a candle flame. Be sure to move the paper constantly to avoid burning.
Safety Tips:
- Adult Supervision: Always supervise children during the heating process to prevent accidents or burns.
- Use Safe Heat Sources: If using a candle or flame, keep it at a safe distance and ensure it is done in a well-ventilated area. An iron or light bulb is safer for younger children.
- Avoid Overheating: Be careful not to overheat the paper, as it can burn quickly. Move the paper around to distribute the heat evenly.
Scientific Explanation:
Lemon juice is an organic substance that oxidizes and turns brown when exposed to heat. This reveals the hidden message written with the lemon juice.
Additional Fun:
- Try Other Juices: Experiment with other citrus juices, like lime or orange, to see if they work as well.
- Spy Games: Use the invisible ink to play spy games, where kids write secret messages to each other.
The Invisible Ink experiment is a great way for kids to explore basic chemistry and the concept of oxidation while having fun with secret messages.
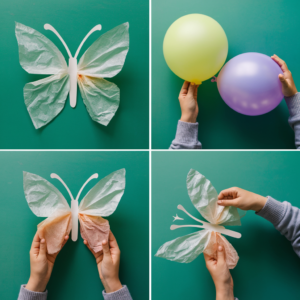
5. Static Electricity Butterfly
Materials Needed:
- Tissue paper
- Construction paper
- Scissors
- Glue
- A balloon
- A wool sweater or hair (for creating static electricity)
Instructions:
- Create Butterfly Body:
- Cut out a butterfly shape from the construction paper.
- Make Wings:
- Cut two wings from tissue paper.
- Glue the tissue paper wings to the butterfly’s body. Allow the glue to dry completely.
- Inflate Balloon:
- Inflate a balloon and tie it securely.
- Charge the Balloon:
- Rub the balloon on a wool sweater or on your hair to create static electricity.
- Lift the Wings:
- Hold the charged balloon near the tissue paper wings. The wings should lift and move due to the static electricity.
Safety Tips:
- Non-toxic Materials: Ensure that all materials used are non-toxic and safe for children.
- Supervise: Always supervise children during the experiment to ensure they handle materials safely.
- Avoid Hair Tangling: When creating static electricity with hair, be careful to avoid tangling or pulling.
Scientific Explanation:
Rubbing the balloon transfers electrons to it, giving it a negative charge. The negatively charged balloon attracts the positively charged tissue paper wings due to static electricity, causing them to lift and move.
Additional Fun:
- Experiment with Different Shapes: Try making different shapes like birds or insects to see how they react.
- Static Electricity Exploration: Explore static electricity further by using different materials to charge the balloon and seeing how it affects other lightweight objects like small pieces of paper or cereal.
The Static Electricity Butterfly experiment is a simple, safe, and visually appealing way for kids to learn about static electricity and have fun with hands-on science.
Conclusion
For more fun and educational activities, check out our Goldenbee Global School.
Engaging in these experiments can help children understand complex concepts in a fun and interactive way. Plus, they offer a fantastic opportunity for family bonding and shared discovery. Happy experimenting!

